Shose expert

17 Years Manufacturing Experience
je

10 Running Sneakers Buying Tips for Global Buyers

Buying running shoes across borders takes more than comparing prices or choosing a familiar logo. A pair that feels supportive in a shop may behave differently on a humid street, a rocky trail, or a long airport-to-hotel walk. Fit, cushioning, grip, weight, and intended use all matter. So do size conversions, shipping costs, return policies, and whether replacement models are available in your region.

Footwear biomechanics researcher Dr. Benno Nigg’s comfort-focused work offers a useful rule, summed up here: “Let comfort guide the fit.” Treat that as a practical guide, not a substitute for trying shoes on. Your toes need room to spread, your heel should feel secure, and the shoe should not rub when you jog. Small details count. Try both shoes late in the day, when feet may be slightly swollen, and test them with the socks you actually run in. A thumb-width of space can help, but comfort is personal.

This guide presents 10 Running Sneakers Buying Tips for Global Buyers, including how to compare shoe categories, materials, sizing charts, and retailer policies. It also considers climate and terrain: a breathable upper may suit warm weather, while deeper traction can help on wet paths. “Sneakers Running” is a broad search term, not a guarantee that every listed shoe suits every runner. One easy mistake is buying for a promotion before checking fit. I have to admit, even a tidy checklist cannot predict how a shoe will feel after several miles. When possible, test the pair indoors and keep the packaging until you know it works.
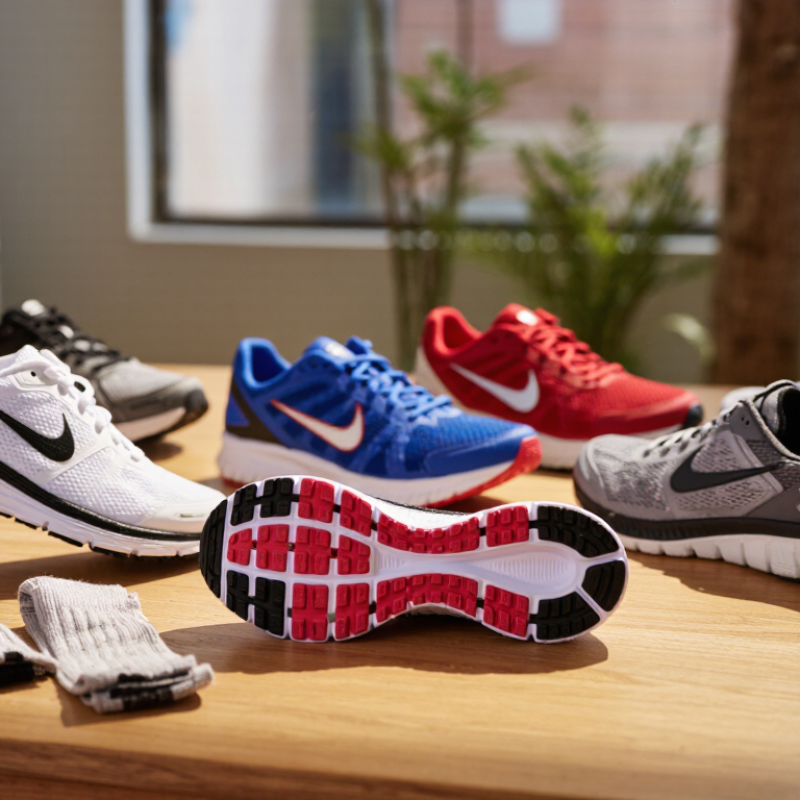
10 Running Sneakers Buying Tips for Global Buyers

Measure Fit at Day’s End: Allow About 1 cm Beyond the Longest Toe

Measure both feet near the end of the day, when daily activity may leave them slightly fuller. Stand on paper in the socks you plan to run in, and mark the heel and longest toe. Compare that measurement with the shoe’s internal space, not just its size label. ISO 19407:2023 provides foot-length-based shoe-size conversions, but sizing systems differ. A familiar number is not a fit guarantee.

Leave about 1 cm between your longest toe and the shoe’s front. The American Podiatric Medical Association’s fitting guidance similarly recommends roughly a thumb’s width of toe room. Check both feet: one may be longer, and the longest toe is not always the big toe. Walk briskly, then jog a few steps; toes should not strike the front, even downhill. Too much space can also let the foot slide. Small detail. Recheck the fit with laces secured, since a loose heel can make a roomy toe box feel deceptively comfortable. These checks are practical, not perfect: sock thickness, swelling, and shoe shape can change the result. If you are between sizes, compare the actual fit rather than assuming the larger option is automatically safer.
Compare Heel-to-Toe Drop in Millimetres to Match Your Running Needs

Heel-to-toe drop is the height difference between a shoe’s heel and forefoot, measured in millimetres. For example, a 32 mm heel and 24 mm forefoot create an 8 mm drop. Drop is not cushioning: two shoes with the same number can feel very different underfoot. A higher drop may feel more comfortable if your calves tighten on longer runs. A lower drop can increase demand on the calf and Achilles area, especially if you switch suddenly. Small change. Noticeable feel. Try shoes on late in the day, then walk and jog briefly. Check that your heel feels secure and your toes can spread.

Research offers guidance, not a universal answer. A randomized trial published in the British Journal of Sports Medicine followed 553 recreational runners for six months, comparing shoes with 0 mm and 10 mm drops. The researchers reported that injury risk varied with runners’ previous exposure to running, rather than proving one drop was best for everyone. That is useful, but easy to overread. When comparing options, note your current shoe’s drop and change gradually; keep distance and pace steady while testing. If your calves or Achilles feel persistently sore, pause the transition and reassess. A few millimetres may matter, but fit, comfort, and training load matter too.

Check Grip Claims Against ASTM F2913 Slip-Resistance Testing

Grip claims need test conditions, not just a dramatic tread photo. ASTM F2913 evaluates footwear slip performance with a whole-shoe tester on specified surfaces and under controlled conditions. The result depends on the surface, contaminant, shoe size, and test setup. Ask suppliers for the laboratory report, including the tested outsole, surface, contaminant, and friction results. ASTM F2913 does not make every test result comparable across different conditions.

The broader risk is real, but workplace figures are not running-shoe ratings. The U.S. Bureau of Labor Statistics recorded 450,540 nonfatal workplace cases involving falls, slips, or trips in 2022. That figure covers many industries and cannot predict a runner’s chance of slipping. Still, it shows why vague “high-grip” claims deserve scrutiny. A dry lab floor may not represent a wet tile entrance or gritty pavement. Testing is useful, not magic.

Tips: Request ASTM F2913 results for the exact shoe model, then check whether the test surface resembles your route. Ask about wet and dry conditions. Try the shoes carefully on safe ground, too. I would not treat one number as a guarantee; real streets are inconsistent.

Use the 300–500-Mile Replacement Benchmark, Then Inspect Tread and Midsole

The 300–500-mile replacement range is a useful inspection cue, not a promise that every pair lasts equally long. A heavier runner, frequent pavement, wet weather, or gritty paths can wear shoes sooner. Softer trails may leave the outsole looking fresh while the cushioning has softened. Track approximate distance in a phone note, and inspect shoes every few weeks once they approach 300 miles. Keep notes. Mileage estimates are imperfect, especially when you rotate pairs or mix walking with running.

Check the tread at the heel and forefoot, where your foot lands and pushes off. Unevenly worn rubber, smooth patches, or an exposed midsole can signal reduced grip or protection. Look closely. Compare both shoes; one side often wears faster. Press the midsole with your thumb and compare it with a newer pair, if available. Deep creases, lasting compression, or a dead, unusually firm feel may matter more than surface scuffs. Press gently. Small cosmetic marks alone do not prove a shoe is finished. Replace it sooner if it feels unstable, causes new discomfort, or slips on familiar ground. If it still feels comfortable, reassess on a short, familiar route; visual checks are useful, but not perfect.

10 Running Sneakers Buying Tips for Global Buyers - Use the 300–500-Mile Replacement Benchmark, Then Inspect Tread and Midsole

# Buying tip What to check Practical guidance Why it matters
1 Use mileage as a replacement checkpoint Your shoe’s accumulated running distance, age, and recent comfort. About 300–500 miles (roughly 480–800 km) is a common range for reassessing running shoes, not a guaranteed lifespan. Replace sooner if the shoe feels worn or uncomfortable; some pairs last longer depending on the runner, shoe, and conditions. Foam and other materials wear at different rates. Distance is a useful prompt to inspect the shoe, rather than a fixed replacement rule.
2 Inspect the outsole tread Rubber wear, smooth patches, uneven wear, and exposed midsole material. Compare both shoes and look closely at the heel and forefoot. Worn tread alone does not always mean a shoe is unusable, but reduced grip or exposed areas call for caution. Outsole wear can affect traction, particularly on wet, uneven, or loose surfaces.
3 Check the midsole for wear Deep creases, permanent compression, cracks, asymmetry, or a visibly tilted shape. Set the shoes on a level surface and compare their shape. Look for changes alongside reduced comfort; appearance alone cannot reliably measure cushioning performance. The midsole helps provide cushioning and stability, and its condition can change with use.
4 Match the shoe to your running surface Road, treadmill, track, compact trail, or technical trail use. Choose a road-oriented outsole for paved routes and a trail shoe with suitable lugs and protection for rough terrain. For mixed routes, consider which surface makes up most of your running. Tread pattern, grip, and protection are designed around different surfaces and conditions.
5 Prioritize a comfortable fit Toe room, heel hold, midfoot security, and pressure points. Try shoes in the socks you expect to run in, and assess fit while standing. Allow comfortable space in front of the toes without letting the heel slip excessively. Feet may change shape during activity, and a fit that feels secure in a shop may feel different during a run.
6 Measure both feet and try them on later in the day Differences in foot length or width and any swelling after daily activity. Use the larger foot as a fit reference. Whenever possible, try shoes when your feet are not at their smallest, and check both feet rather than relying only on a size label. Sizing systems and shoe shapes vary, and nominal sizes are not fully standardized across markets.
7 Consider width and upper volume Pressure along the sides, pinching over the instep, and movement inside the shoe. Look for a shape that holds your foot comfortably without forcing it into the upper. If a shoe feels tight when laced normally, try another width or shape instead of assuming it will stretch enough. Foot shape varies, and a suitable length does not guarantee a suitable width or overall fit.
8 Choose cushioning and support by feel Comfort, stability, flexibility, and how the shoe feels during a short test run. Compare options at a comfortable pace if possible. Avoid choosing solely by marketing terms or assuming that one cushioning level or support feature suits every runner. Comfort and preferences differ, and shoe features do not guarantee injury prevention.
9 Check the upper, seams, and sole attachment Tears, fraying, damaged eyelets, loose stitching, and separation between the upper and sole. Inspect both shoes in good light and flex them gently. Minor cosmetic marks are different from damage that affects fit, security, or function. Structural damage can reduce support or allow the foot to move unpredictably inside the shoe.
10 Plan for climate, import costs, and returns Local weather, delivery time, taxes or duties, return shipping, and exchange terms. Before buying internationally, confirm the seller’s size chart, total landed cost, return window, and whether used or tried-on footwear is eligible for return. A shoe that fits the intended use may still be a poor purchase if sizing exchanges are difficult or the total cost is unclear.

Check Size Conversions With ISO 19407:2023 and Road-Racing Shoes’ 40 mm Stack Limit

For global buyers, compare foot length in centimeters before comparing size labels. ISO 19407:2023 provides conversion tables between major footwear sizing systems, but converted sizes are only a starting point. Different lasts and toe shapes can change the fit. Measure both feet while standing, then use the longer measurement. Leave a small gap in front of the toes. Feet swell during long runs. Try shoes later in the day, ideally with the socks you plan to wear. A size chart cannot reveal pressure across the forefoot, and I would not treat a neat conversion as a fit guarantee.

For road-racing shoes, check the sole stack separately from the size. World Athletics’ Technical Rules, Rule 5.2, set a 40 mm maximum sole thickness for shoes used in regulated road events. That is a competition limit, not a general comfort or injury guideline. Measure carefully: outsole lugs and the heel-to-toe shape can make visual estimates misleading. A shoe close to the limit may need confirmation against event rules. One easy detail to miss: the same shoe can feel secure standing still, then rub after several kilometers. Do a short test run before relying on the size label alone.

Running Shoe Buying Guide: Check Size and Stack Limits

World Athletics regulations set a maximum sole thickness of 40 mm for road running shoes and 20 mm for track-event shoes. ISO 19407:2023 provides shoe-size conversion guidance across sizing systems; use conversions as a starting point and check the seller’s measurements and fit guidance before buying.